
ConnectWise integration instructions
Connecting Customer Thermometer with ConnectWise
Here’s how to connect Customer Thermometer and ConnectWise together. In under 10 minutes you can have 1-click surveys embedded within your ConnectWise ticket email workflows.
An overview of Embedded Thermometers (if you’re unfamiliar with Customer Thermometer)
An overview of Embedded Thermometers
This video will show you how Embedded Thermometers work as well as how to create landing pages to capture customer comments following a response and where to see your alerts and reporting.
1) How to create a ConnectWise Thermometer
Once you are familiar with the concept of Embedded Thermometers, follow the instructions below to set up a ConnectWise Thermometer.
How to create a ConnectWise Thermometer
If you aren’t already familiar with the concept of Embedded Thermometers, do watch the short video in the section above.
Assuming you are, let’s look at the specific fields to be entered, to create your ConnectWise Thermometer. We will ignore the other settings for now.
1) Create a new Embedded Thermometer from the Manage Thermometers screen.
Choose “ConnectWise” from the i) Embedded Thermometer type drop down box.
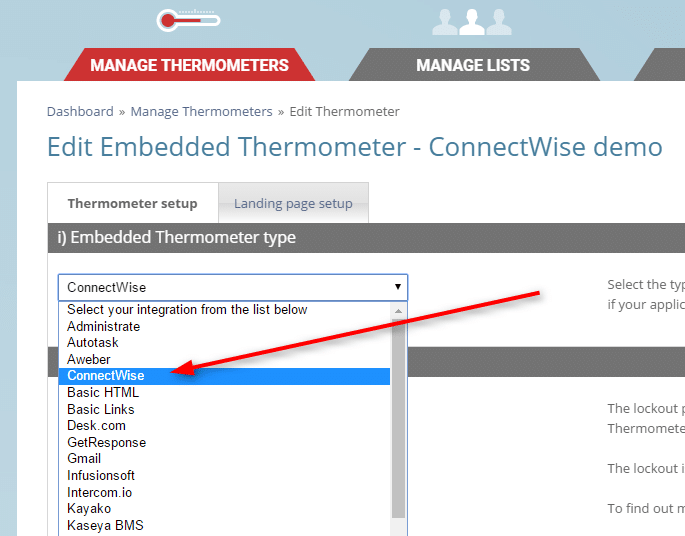
This is the only mandatory option.
The options below are optional, but will mean Customer Thermometer responses are written back into the ticket itself.
2) Next, enter your ConnectWise site address.
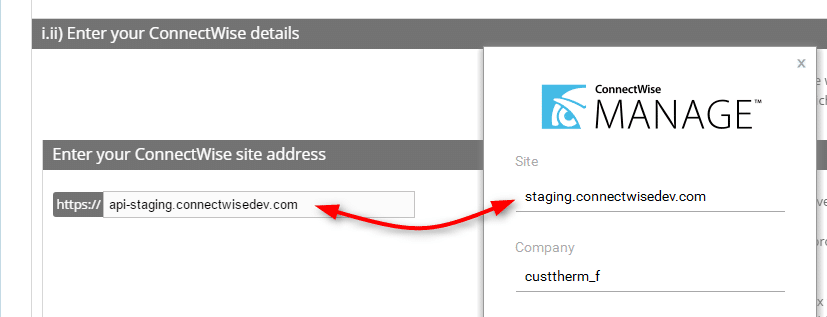
Are you connecting to the Cloud or Staging?
If so, you must include “api-” in front of the ConnectWise Manage site. Examples below:
api-au.myconnectwise.net
api-eu.myconnectwise.net
api-na.myconnectwise.net
api-staging.myconnectwise.net
3) Enter your ConnectWise company ID
4) Enter your public and private API key
Note you can create and find these keys by following these instructions.
5) To ensure you’ve entered your details correctly, click the “Verify credentials” button for confirmation. Correct any issues as need be.
6) Continue down the rest of the setup page and then complete the Landing page set up.
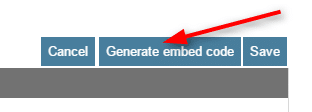
7) When you are happy, click the Generate embed code button.
Next, you’ll need to enter/customize the ConnectWise email tokens – these will dictate which pieces of data are captured next to each response in your reporting.
We pre-populate some useful tokens, but you can amend/add to these if you like.
Please note: Custom 1 must contain the ticket number for the writeback to work.
When you’re happy, click “Generate HTML”.
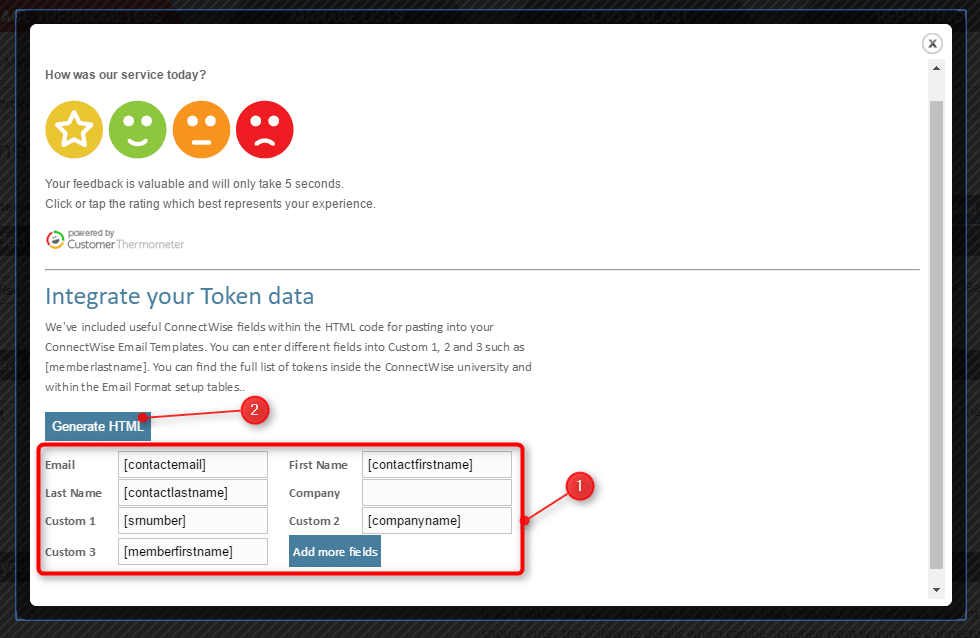
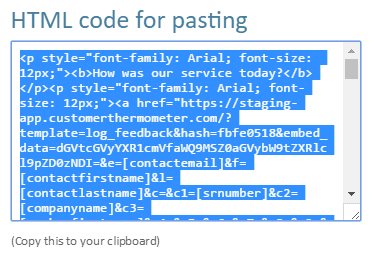
8) The HTML embed code, which is to be inserted into the ConnectWise closing ticket email template is then generated.
Click to select it and then copy it to your clipboard and move on to the next stage.
2) How to add a Thermometer to your Ticket closure emails
Once you are familiar with the concept of Embedded Thermometers, follow the instructions below to set up a ConnectWise specific Thermometer.
Adding Thermometer embed code to ticket closure emails
Now you’ve generated your Thermometer embed code – it’s now just a simple case of adding it to your ticket closure email template.
In fact, you can add this embed code to any email leaving ConnectWise, which is attached to a workflow – for example, the the reply thread. The same principles apply below, regardless of the template / service board you add the survey buttons to.
1) Visit System > Setup Tablets. Search for email:
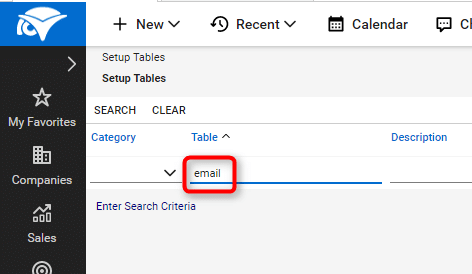
Select “Email Formats” from the results.
2) Edit the Completed ticket template OR create your own template + workflow as required
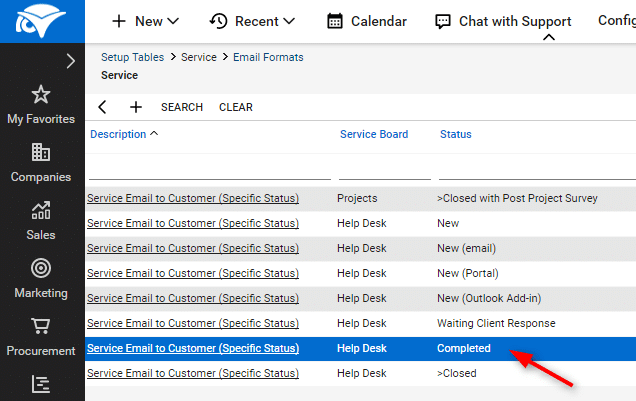
3) It’s now time to add the Customer Thermometer embed code to your ticket closure email template.
It’s also a good opportunity to review how ‘friendly’ the email is – could you reword it to make it more relevant and encouraging to your recipients?
When you’re happy with your wording, it’s time to add the buttons…
Switch to “Source” view:
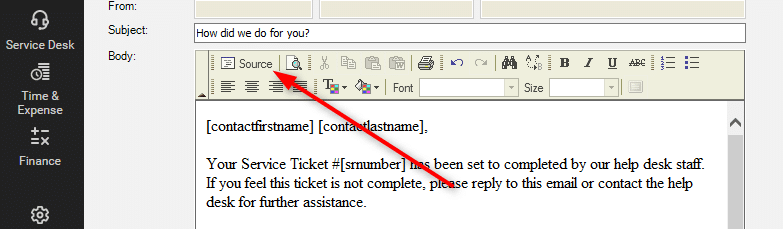
Paste in your embded code (from the previous set of instructions) at the appropriate point in the template.
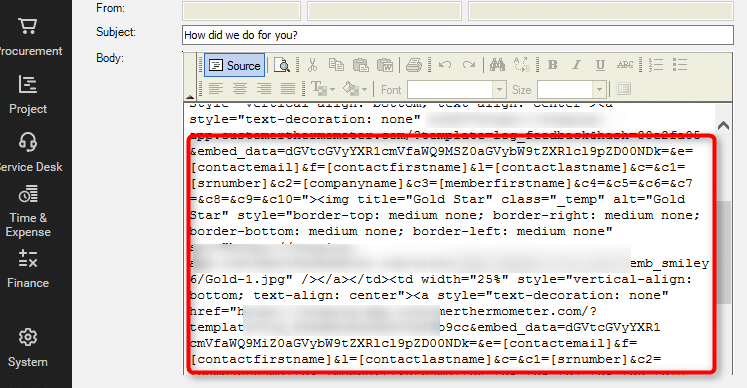
4) Don’t forget to scroll right down and click “Save HTML Template”.
That’s it – you’re done!
3) How to add a rating writeback into your ConnectWise ticket
By creating two separate elements within your ConnectWise instance, ratings and comments can be posted back in realtime against your ConnectWise ticket. This is an optional, but powerful option.
Creating the "LatestRating" custom field (optional)
You can now choose whether you’d like to keep your ratings stored within your Customer Thermometer account or, in addition, get them pushed against the ConnectWise ticket.
One of the benefits of pushing them into ConnectWise is that you can then create workflows off the back of a received rating.
1) To create the custom field, “LatestRating” which sits within the ticket screen, navigate to the setup tables, search for custom fields.
Choose the “Service” screen, and select “Ticket“.
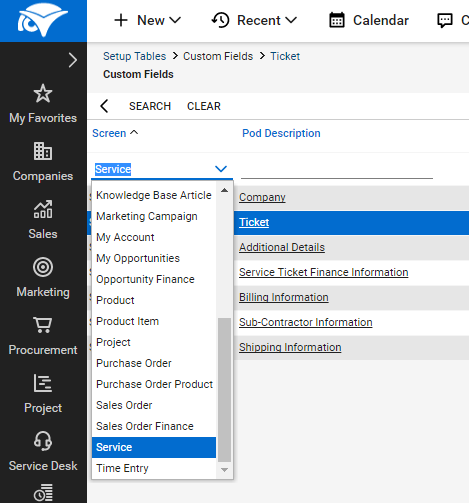
2) Inside that ticket screen, at the bottom, you’ll have the ability to add a Custom field. You’ll see one we’ve already created below:
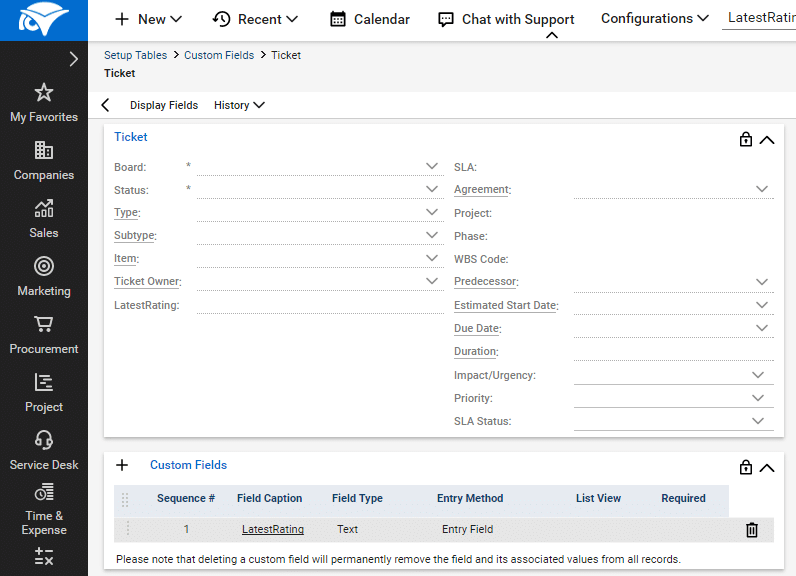
Let’s see now see how to create this specific field.
2) Expand all of the tabs of the “Add New Custom Field” screen and enter the details, as shown below. (Click the image to expand it for clarity.)
*NOTE: Please ensure that the “LatestRating” field is entered exactly as shown, or it won’t function.
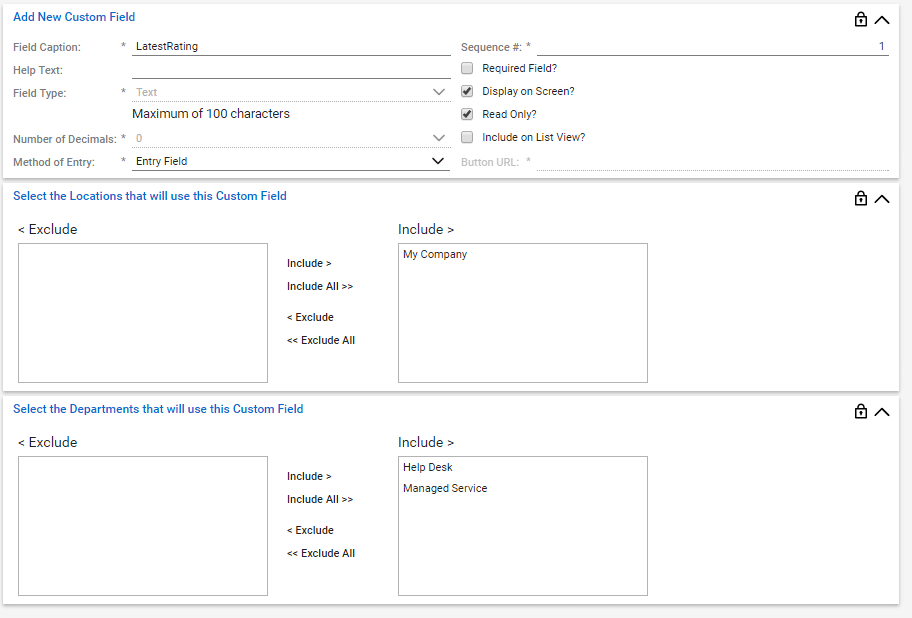
3) Ensure you save your changes, by clicking the save button at the top of the screen.
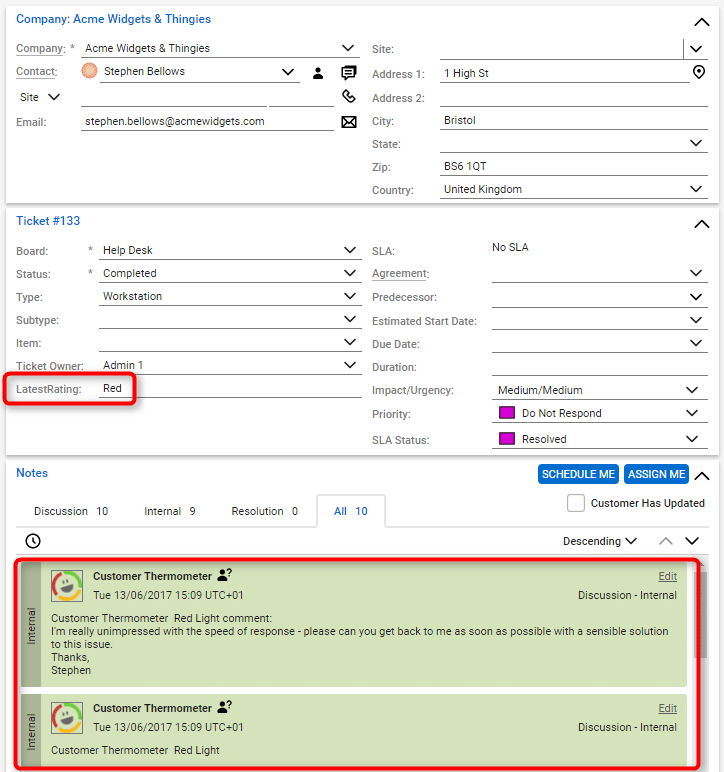
You’ll now see the “LatestRating” field appear on your ticket screen. Customer Thermometer will update that with ratings as they come in, against each ticket.
Creating the API member to allow writeback (optional)
Creating the API member to allow writeback (optional)
This is the second part of the optional process to allow rating writeback against the ConnectWise ticket.
All connections into ConnectWise require a public and private API key. These keys need to be added to the Customer Thermometer Edit Thermometer, as mentioned in the section 1 above.
1) Firstly, navigate to System > Members > API Members.
We’ve already got one set up below.
You will need to create a New API member.
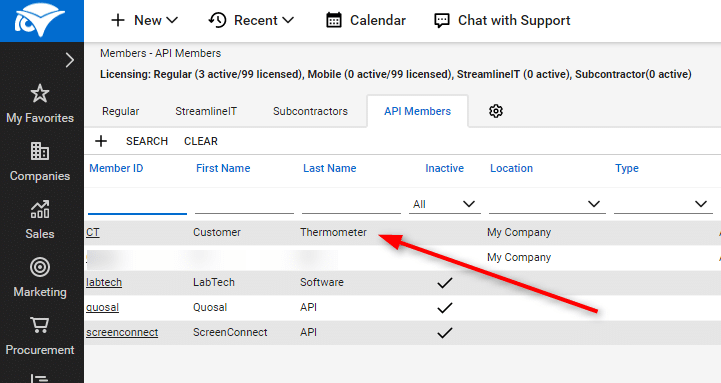
2) To create a new API Member, fill in the fields as shown below:
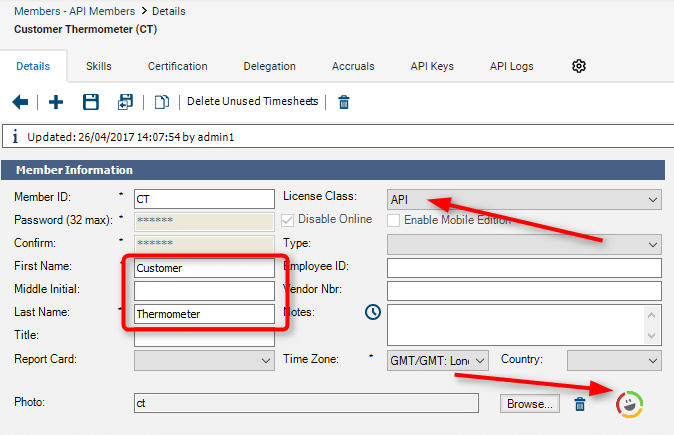
Note that if first and last name are Customer Thermometer and you include our icon (download it from here) then you will see that appear on your Internal comments when ratings and comments are pushed against the ticket.

Under Security Information, select the Role ID, “Admin” and it’s always a good idea to add a real email address under contact information.
The remainder of the fields just need to show defaults.
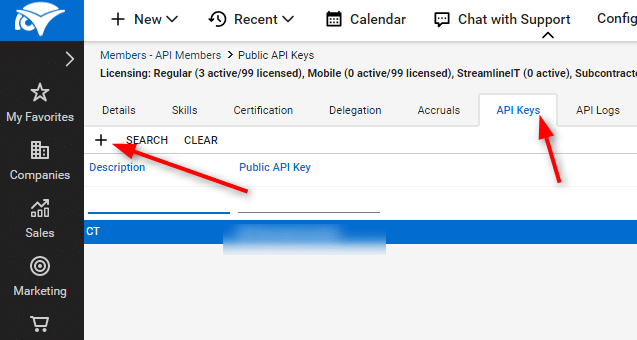
3) Finally, you will need to generate your keys.
Create a new key and give it a name and click save.
A new public and private key will then be created for you:
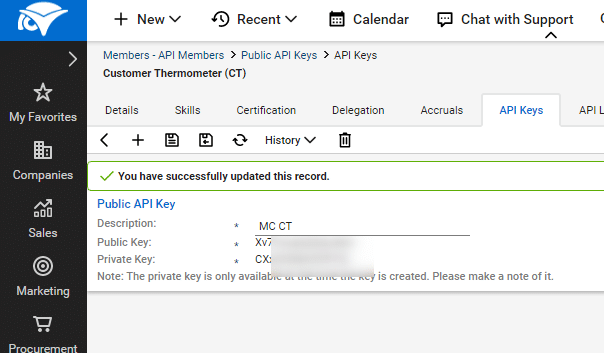
4) Copy each one in turn and paste them into your Customer Thermometer edit Thermometer screen:
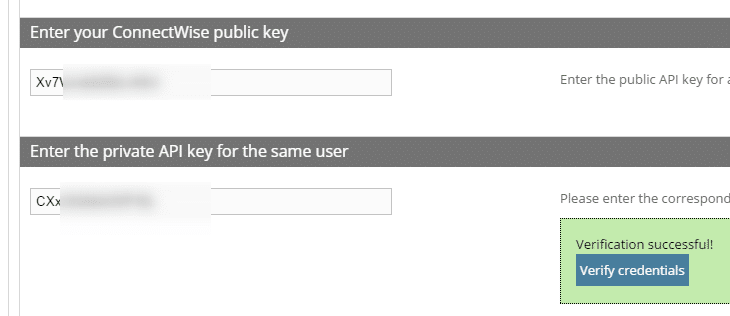
It’s always worth verifying those credentials too, as discussed in section 1 above.
You are now done!
Once set up is completed, every click and comment is stored within your Customer Thermometer account.
You can also see an example ConnectWise ticket screen below:
ADDITIONAL OPTION: How to send a Thermometer on PROJECT closure
Once you are familiar with the concept of Embedded Thermometers, follow the instructions below to set up a ConnectWise specific Thermometer.
Setting up Customer Thermometer surveys on PROJECT closure
*note older style screenshots – but the principles are the same*
For this to work, you will need to set up a project closure workflow. Do this from the setup tables:
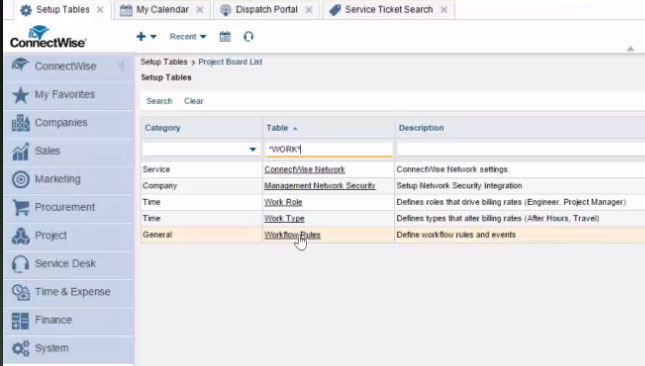
Next, define an event – Project is Closed.
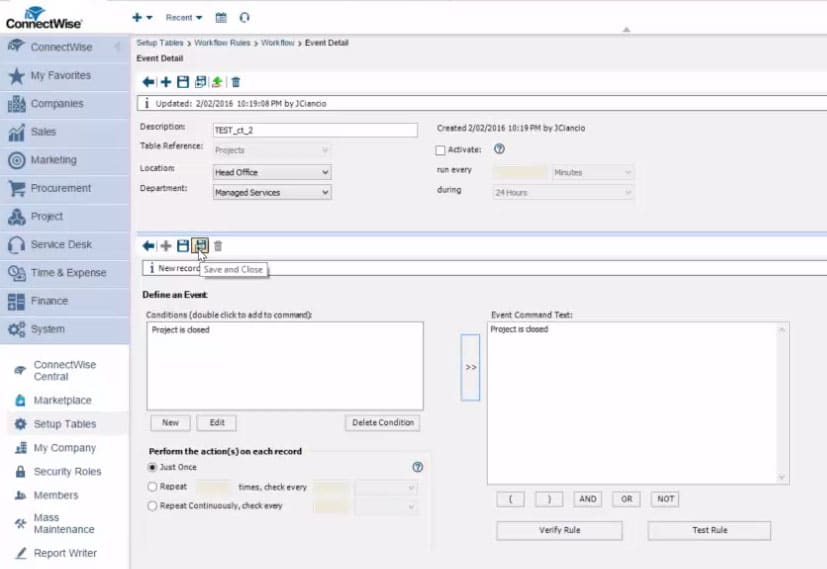
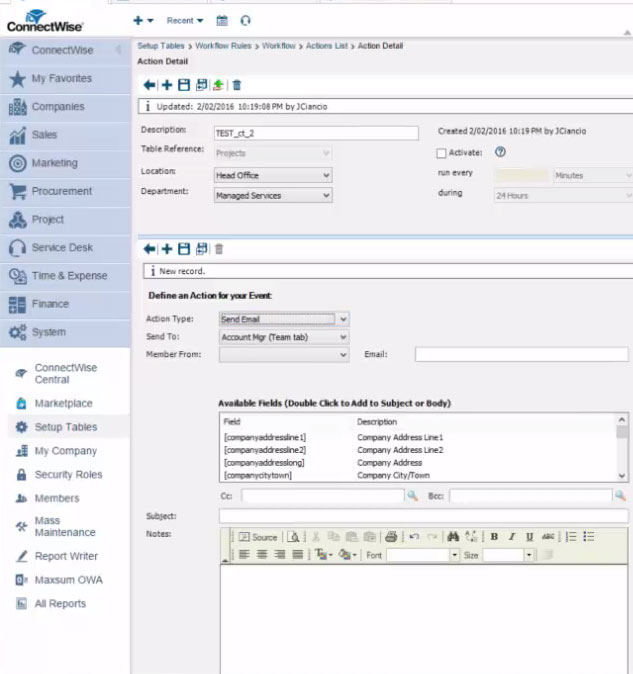
Finally – define an action for the event on Project closure – in this case “Send Email”.
Create the email in the template shown. When you’re ready to embed your survey buttons, click the “Source” button to display and accept HTML and then paste the HTML code generated from your Customer Thermometer template (see the instructions above for more detailed information).
Verify that rule and your workflow is complete.