
Zendesk integration instructions
Using Zendesk with Customer Thermometer
1) How to quickly set up an Embedded Thermometer
This short video explains how you can set up your survey to embed within your Zendesk tickets.
2) Adding Customer Thermometer surveys to your Zendesk support tickets
Once your survey has been built in Customer Thermometer, it’s time to get it working with your Zendesk account. We help by showing you how to connect the relevant Zendesk Placeholder custom fields. In one simple copy and paste, the job is done… watch this brief video to see how it’s done.
3) How to writeback Customer Thermometer ratings and comments into Zendesk support tickets
Zendesk integration with Customer Thermometer is very simple. By adding a few additional fields to your Embedded Thermometer build screen, Customer Thermometer ratings and comments associated with that Thermometer will be added directly into the Zendesk support thread. This is also possible when the ticket is still Open (ie not solved).
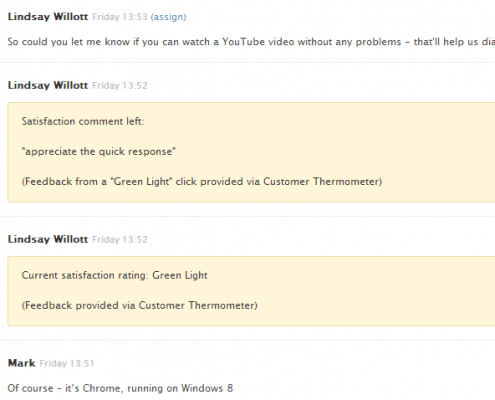
Once a ticket is solved, the next Customer Thermometer rating received against the ticket will be logged against the Zendesk satisfaction rating. Gold and Green will show as GOOD… Yellow and Red as BAD.
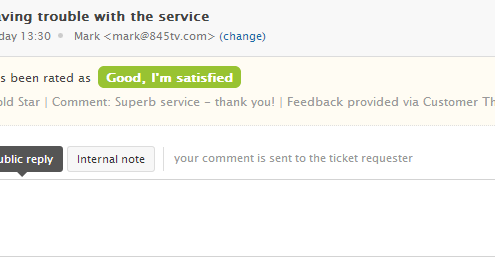
How to get this working with your account.
Create a new Embedded Thermometer and select Zendesk from the drop down menu.
You will then be prompted to add additional Zendesk related information:
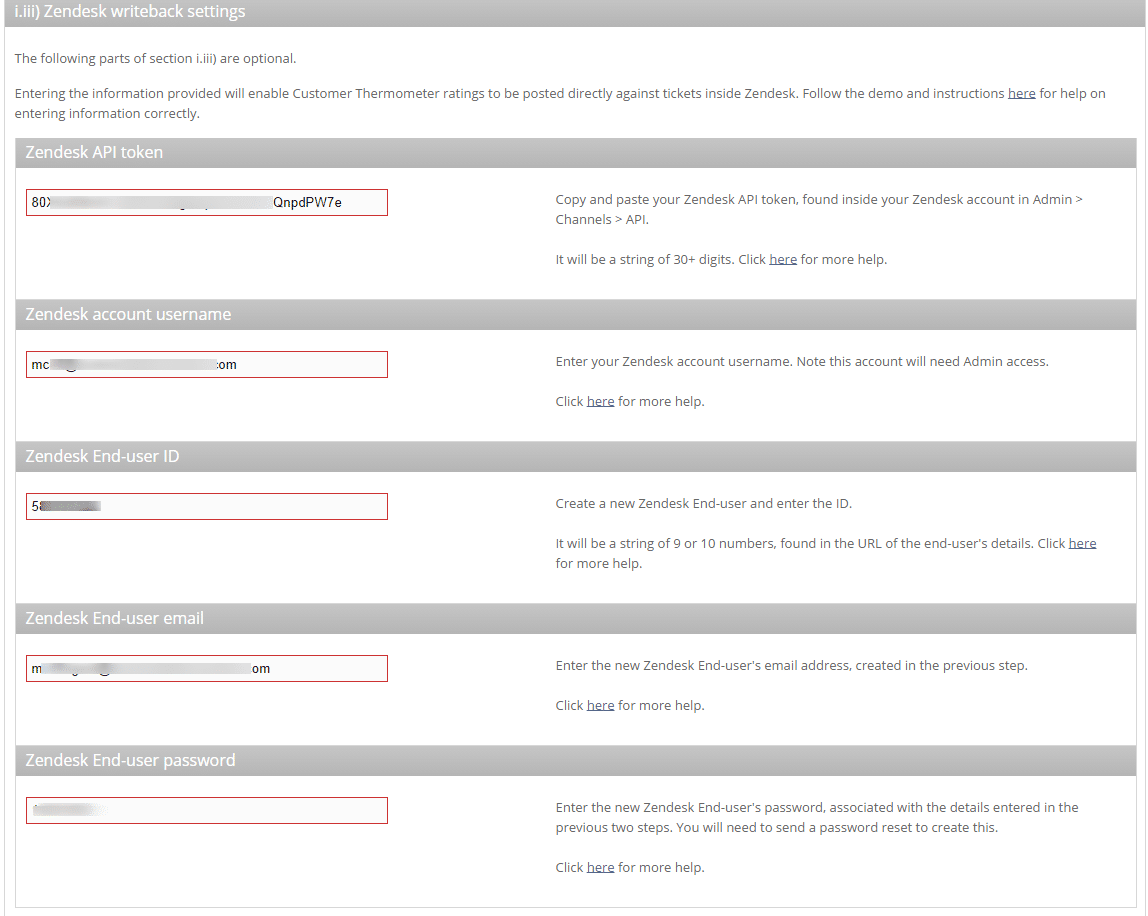
This short guide below will explain how to obtain this information from your Zendesk account. Please pay close attention to the detail or the write back won’t work!
NOTE: you will need to be an Admin user of your Zendesk account to find this information.
Zendesk API token
Use the screenshot below to find your Zendesk API token. Note the one showed below is blurred out for security reasons.
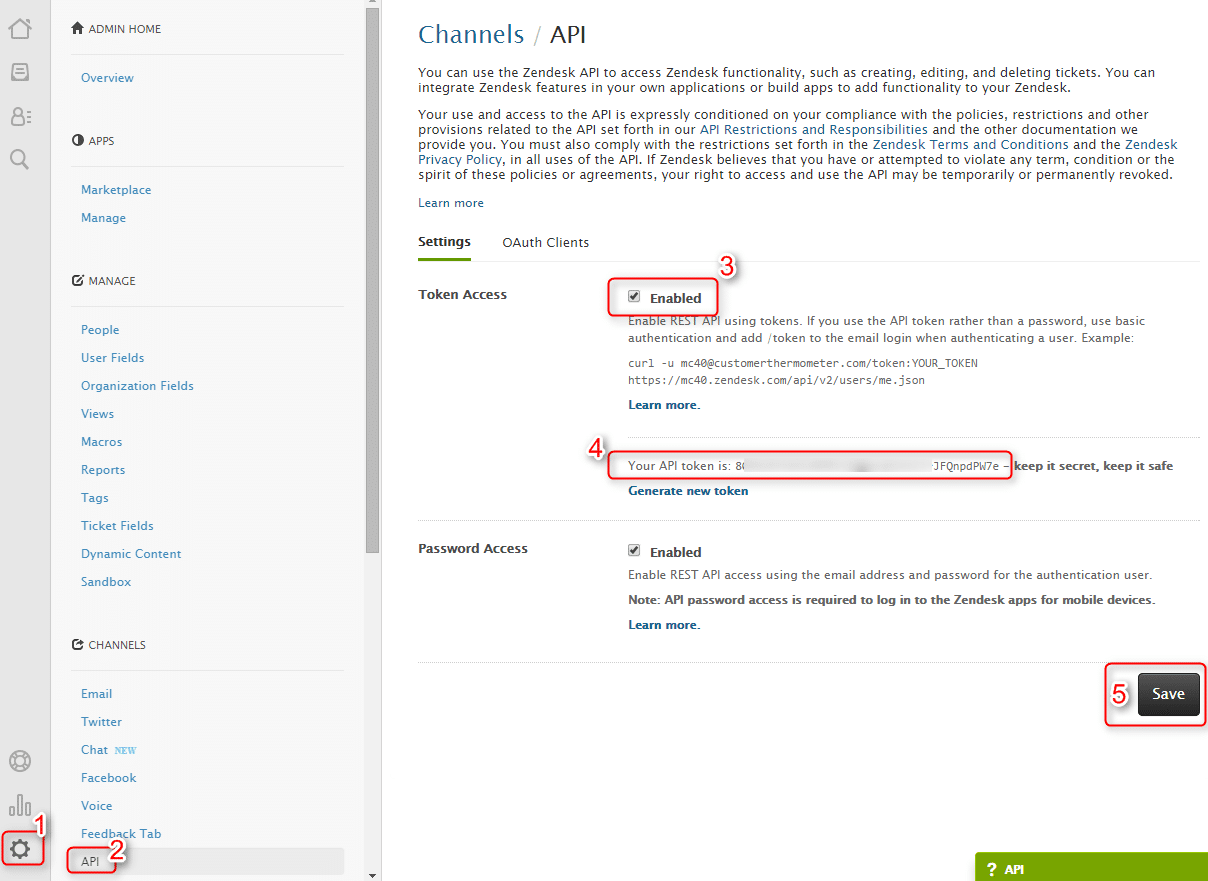
Tick the box as shown to display the key. Highlight the key and then copy and paste it into the relevant field inside your Thermometer.
NOTE: Be careful not to include a space at the end.
IMPORTANT: Once you have done this, click SAVE button as show in the diagram above (5). This is important and will enable the API.
Zendesk account username
This is the email address of an account login with administrative rights.
Zendesk End-user ID & Zendesk End-user email
This may sound a little tricky, however you will need to create a new End-user within your Zendesk account, which is required for the write back to work correctly. We are only able to make this work for customers, by transferring the ticket to another End-user and then back again in this process. You will not see anything happen within your Zendesk account – it’s a one time setup to ensure this writing back works correctly.
Make sure you add an email address you have access to – as you will need that to reset the account password shortly.
To create a new End User, click +add on the top left of the top menu and then select user.
Type a name, Email address and select the role “End user”.
You will then receive a welcome email which will invite you to create a password and verify your account. Make sure you are logged out from your Zendesk account before you do this!
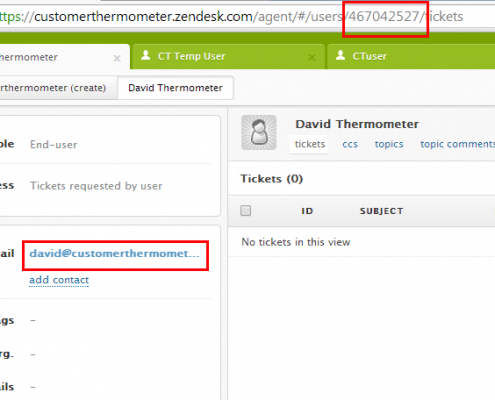
Once it’s been created, log back in as an admin, go to that End-user’s page inside your Zendesk account – and copy the user ID from the URL shown in the image below and enter that into the User ID field in the Embedded Thermometer build screen.
Zendesk End-user password
Finally, go ahead and enter the password you used to create that end user account.
You can then finish the rest of the detail around your Thermometer and click save.
If you’ve followed these instructions carefully, the write back will then work as shown in the video above.
Any further questions or problems – don’t hesitate to get in touch…
Drop us a line using the form below.